Lightroom + Behringer X Touch Mini

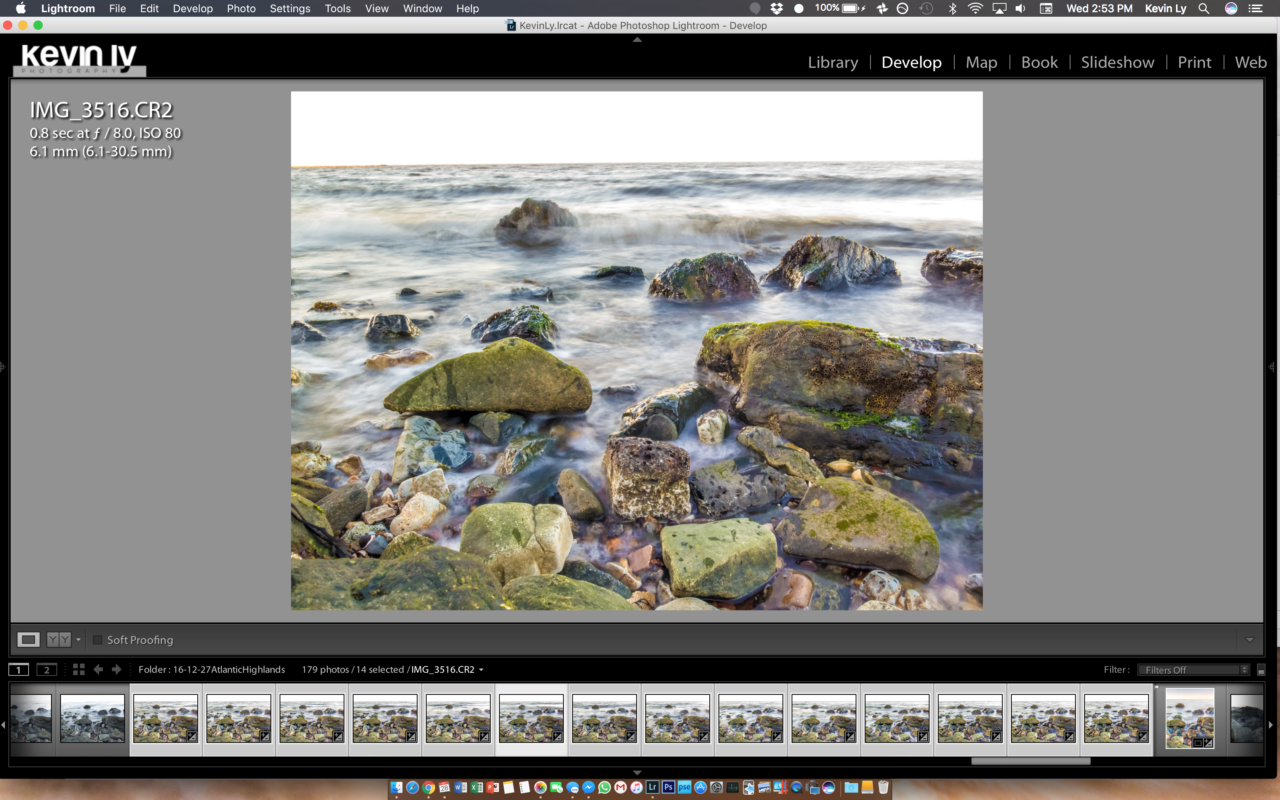
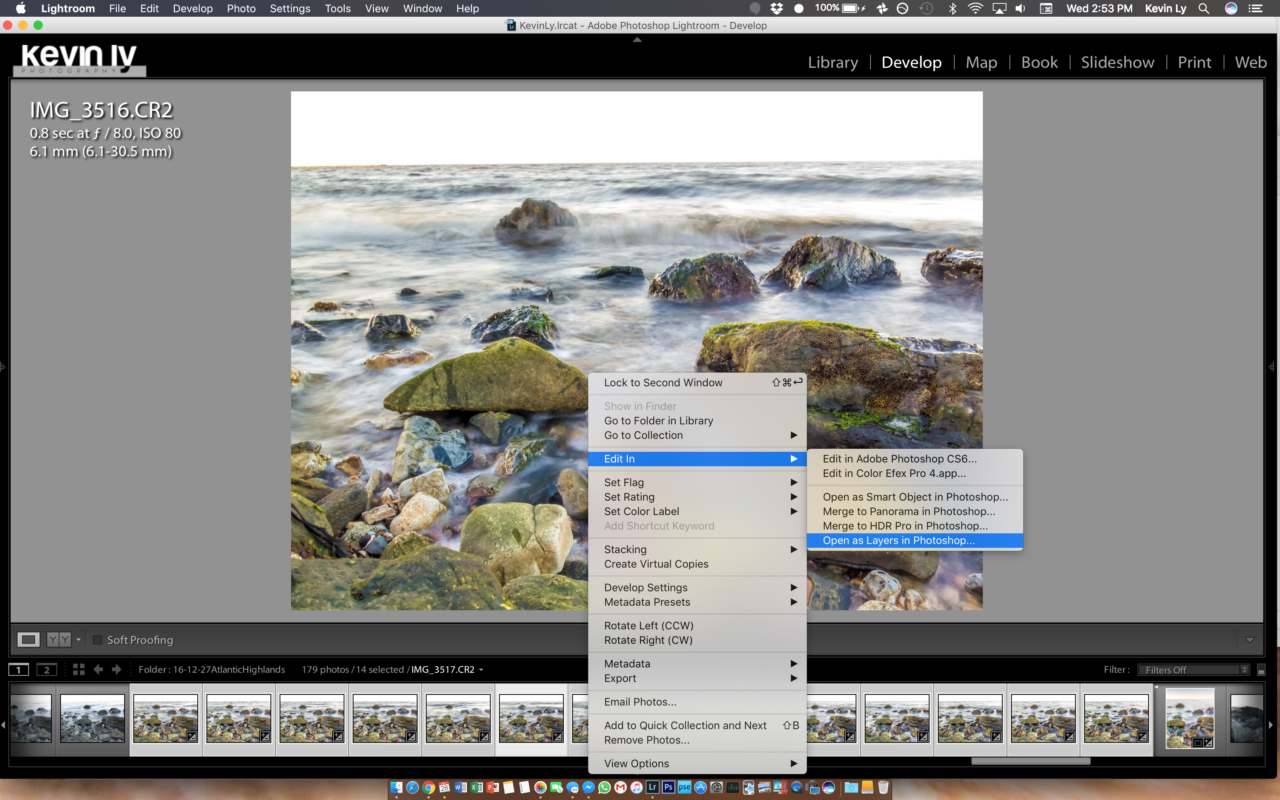
There have been many versions of Lr consoles for editing released in the last year or two. Most of these options are 1) expensive 2) expensive 😉 As I enter into event photography, editing 1000s of photos is getting quite tiring and time consuming even with presets and Lr’s great batch functionality. I wanted an easy way to fine tune image to image without scrolling up and down through Lr’s panels.

This is the most affordable alternative to the Loupedeck and Palette Gear (both of which are designed for and work amazingly) but cost way too much to be limited to one use in my opinion. These options are designed for Lr and have labels and actions already assigned to each button with a few function keys that are left to the end user to assign. They are all very well thought out and priced accordingly.

I decided to go with the open source option. It requires a bit more setup but not significantly more and the money I saved made it worth it. I’m going to break everything down and hopefully you’ll have an easier experience than I did.

What you’ll need:

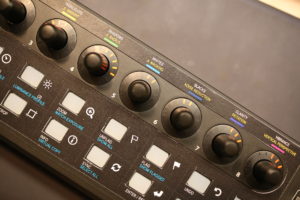
The unit: Behringer X-Touch Mini – $49.99 on Amazon

Adobe Lightroom

Software: MIDI2LR – Free

The rest of the files: my dropbox

A Windows computer for part of the setup process (once it is setup, everything is MacOS/Windows compatible)

Setup (contributions by Joseph Naim)

  1. Make sure your computer recognizes the controller when you first plug it in.
  2. My Macbook needed some help through the “Audio MIDI Setup”.
  3. Run Behringer X-Touch Editor
    1. (ON WINDOWS PC ONLY – I used Parallels but finding a friend with a Windows PC or Bootcamp should work as well)
  4. Load “Behringer X-Touch Editor Preset (Layer A).bin” and ‘Dump A’ to Hardware
    Laod “Behringer X-Touch Editor Preset (Layer B).bin” and ‘Dumb B’ to Hardware
    Exit X-Touch Editor

    1. Windows portion complete
  5. Install Midi2LR
    Locate the MIDI2LR.lrplugin installation folder. (ie C:\MIDI2LR.lrplugin)
    Open “Behringer X-Touch Midi2LR presets.rar” and copy folder into ‘MIDI2LR.lrplugin’ folder.
  6. Run MIDI2LR and goto Settings
    Check “Enable Pickup Mode”
    Click “Choose Profile Folder” and select “C:\MIDI2LR.lrplugin\Behringer x-Touch Mini”
  7. Run Lightroom
    Goto File> Plug-in Extras> Load Presets
    Select “MIDI2LR Lightroom Settings Preset.txt” and select ‘Open’
  8. Goto File> Plug-in Extras> Options
  9. From here, everything should be pretty much set up. The rest is up to you to customize and edit to your liking.

I personally decided that I wanted to start from scratch to make it fit my workflow better however I did use the original .xml files to save myself some work with the Hue, Sat, Luminance sliders. The .xml files listed in the presets folder can be edited in text form (via text editor) instead of using the MIDI2LR interface to add and change button actions. I found this a little faster if you know what the actions are called.

Some things that took me time to figure out. The Lightroom plugin extras > options window is where the magic happens.

You can add keyboard shortcuts as single button pushes. For example, “before/after” is not listed in the original plugin. You can add in “\” as one of the open keyboard shortcuts and then assign that as a button. Similarly, you can assign your presets as buttons and develop module filters as individual buttons.


Hope that wasn’t too wordy and it helped a little bit. Feel free to comment with any questions.

Learning Curve: Installation was a bit tricky on a Mac, I knew this going in. It was hard because I was on Parallels trying to do the Windows portion and couldn’t tell if it was getting confused at where to be inputting or if something was wrong with the unit. Eventually I learned I needed to enable the device through the MIDI settings of MacOS itself.

Once that was working, everything seemed to click into place (sorta literally). Everything worked as advertised and the customization began. Learning how to customize had a bit of a learning curve but that’s because I flipped the entire thing on its head and buttons were on opposite sides of where they started. You don’t have to do that obviously.

Using the unit itself versus a keyboard and mouse? I found felt awkward for the first few photos and just figuring out how to get your muscle memory to go toward certain encoder knobs and where they were. I found myself playing with the Hue/Sat/Lum options way more now than I used to.

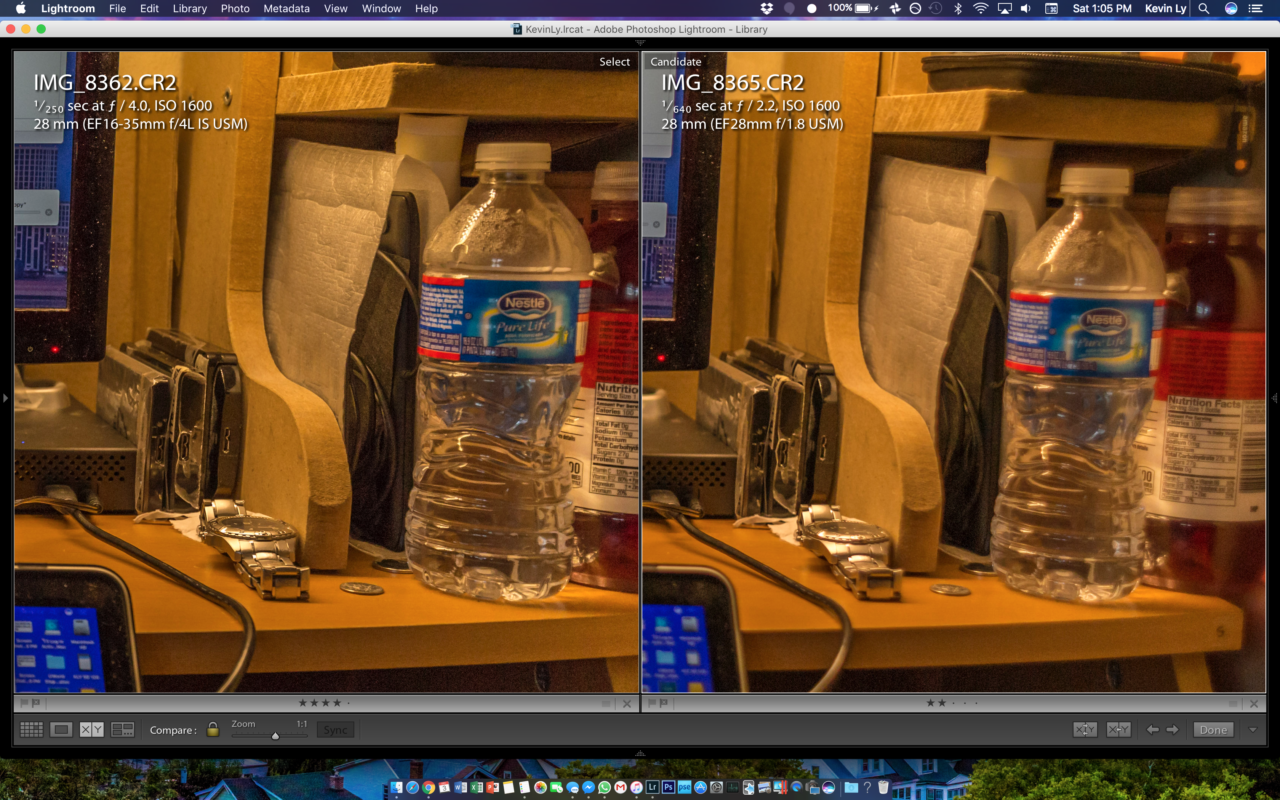
I found this useful when editing event photography, making changes in exposure from photo to photo and also found straightening photos easier with this versus using the mouse/keyboard. You save a few clicks and that adds up across 100s-1000s of photos.


OTHER OPTIONS

Because MIDI2LR is just software, it’s compatible with any MIDI controller. You can roam Amazon and the web for other options and there are plenty, just keep these things in mind.

Encoder knobs and motorized sliders are the best options

Unmotorized sliders still work but you can imagine, when you’re moving between photos, the settings will not update on the slider and then you will have to manually move them past their current values before the sliders go into effect.

Encoders are infinite spin so they are always ready. Motorized sliders update according to their values between photos on their own.

Creating daytime long exposure photography

Daytime long exposure photography is much rarer and seemingly more difficult than long exposures at night. At night, more often than not, long exposure is necessary to get a proper exposure. During the day, shutter speeds can be anywhere between 1/100 to 1/8000 and still retain a proper exposure. There are some times during the day however when we would intentionally want a long exposure, such as running water, streams, waterfalls, capturing motion. In some cases, panning at 1/50sec is enough in fast moving cars or bikes. With landscapes however, we usually need 30seconds-1minute to achieve a silky blurred effect on the water. As most people find out very quickly, that is very hard to achieve even with a regular ND filter or polarizer in direct sunlight. The expensive and proper approach is to get a 10 stop ND filter, end of story, but what if I told you there’s an easier way to get 98% of the same effect without an ND filter at all.

In this method, I will be using a Canon G16 point and shoot, Lightroom and Photoshop to composite the final image.

Setting up the shot: Use settings that will minimize light to the sensor in order to maximize shutter speeds. Settings on my camera were: ISO 80, f/8.0 on Aperture priority creating a final single shot shutter speed of .8 seconds. I kept my focal length/zoom as wide as possible in order to crop/straighten as necessary as I didn’t have a tripod either. I used a flat rock. Knowing before hand I wanted about a 15 second exposure I held down my shutter in order to shoot about 20 shots to total close to 15 seconds at .8 each. It is important to keep your composition the same through this series.

Import into Lightroom and process as necessary before proceeding. 

Most of the fancy magic happens in PS so I selected my entire set and selected the Edit in PS as layers option. This will automatically open the series as individual layers in the same PSD file. 

Once you have them all loaded, you want to align the shot in case there was slight movement, especially since I didn’t use a tripod I wanted to make sure everything was aligned however in every case, I recommend aligning the shots again just to make sure. 

To do this, make sure you highlight all your layers.

I chose the auto align option since I didn’t expect much movement between my shots and PS can do a decent job guessing in this scenario.

For fixed shots / semi fixed where you intentionally don’t move as much as possible like how we set up this shot, the Auto option is usually enough.

Once your images are aligned, select all your layers again and choose Convert to Smart Object

Once your images are converted to the smart object we want to change the stack mode of this smart object to Mean. Mean as we learned in math is the average so PS will average out every pixel at a given spot to the average value across every layer. This results in the average across the total exposure time of shutter speed x #frames which simulates a long exposure of about 15 seconds. If every frame is about a second and we have 15 frames, adding all those frames together and dividing by 15 will be very similar to if you had a single exposure at 15 seconds.

The final result is seen here.


This technique can be applied to almost every short shutter speed scenario requiring long exposure times. Simply calculate the total frames needed in order to simulate your total exposure.

If this post/tutorial helped, let me know in the comments and let me know if you’d like to see more or if there are any requests for different techniques.


First Impressions: Canon 16-35 f/4 L IS

Just a little background. I shoot landscapes but have been managing to get by with telephotos and using a Rokinon 24 f/1.4 (fully manual) when I need a wide. My widest Full Frame AF lens is a Canon 28 f/1.8 which I have had since I started photography. As most people, I started out in the crop sensor body world, when I had a Tokina 11-16 f/2.8 which I loved, however when I moved up to FF, this lens wasn’t as useful to me anymore.

That being said, this initial impression is targeted at a quick study of performance at 28mm to determine where my 28 prime would fall in my lineup, if it even needs to be there anymore.

I did comparisons at 28mm on the 16-35 and compared them at f/4 with the same ISO. I used A mode because I did not feel the shutter speeds would have varied much at matching apertures anyway. IS was left on for the 16-35 and my 28 prime does not have IS.

For these tests, I have used Lightroom’s compare feature and with the exception of the first image, all will be at 1:1 or 100% zoom

This first one is 28mm f/4 on both lenses and at first glance looks indistinguishable.

f4-comparison

Lenses are usually sharpest at the center so the next set does not show much. Equally sharp on both in my eyes.

f4-center

The next two are right middle edge and left top corner

f4-edge f4-corner

To me these are both appropriately sharp and there is no distinguishable difference.

The next set, I decided to test the 16-35 f/4 vs 28 at f/1.8 wide open. Most lenses are always a little soft wide open so I will then follow up with a f/2.2 test to mitigate the inherent softness wide open. The 16-35 will remain wide open at f/4 with IS on however.

Here are the f/1.8 images. Compared at similar zoom points. The Left is the 16-35 zoom and the Right is the 28 f/1.8

f4-vs-1-8-center f4-vs-1-8-corner f4-vs-1-8-edge

As expected, wide open, the f/1.8 is significantly more soft on edges and corners. The center remains usable however which is the only reason I have held on to this lens as an AF alternative on my FF camera. The added stops of light make this still a fairly usable night photography camera especially once you stop it down to f/2.2 as seen in the following set. f4-vs-2-2 f4-vs-2-2-corner f4-vs-2-2-edge

As you can see, f/2.2 is still softer however the added stop of light allows for faster shutter speeds and a shallower depth of field.

In conclusion, I will continue testing the 16-35 f/4 L IS as my new wide angle FF AF lens. I believe the IS will allow me to take images at slower shutter speeds, potentially 1-2 stops more than I was with my 28 f/1.8. This in turn should compensate for the loss from f/1.8 to f/4. I have yet to test this in real world situations though.

I will have to determine whether or not the f/4 is able to perform in low light settings. If the lens struggles to focus in darker settings or the IS is unable to compensate the slower shutter speeds needed at a maximum aperture of f/4, I will have to continue holding on to the 28mm f/1.8 as a primary AF wide angle night lens or continue to use the Rokinon 24 f/1.8 MF lens. The Rokinon is sufficiently sharp at f/1.8 however the limitation of it being a manual focus lens makes it highly impractical for day to day usage.

Canon 16-35 f/4 L IS

  • Pros
    • Wider
    • Covers a wider range as well, including 28mm
    • Sharp wide open
    • IS
  • Cons
    • f/4
    • Difficult to focus in low light due to f/4
    • Limited bokeh at f/4

Canon 28 f/1.8 II

  • Pros
    • f/1.8
    • Smaller and cheaper
    • Equally sharp to the 16-35 f/4 at matching settings
    • Decent bokeh at f/2.2
    • $ half the price of the Canon 16-35 f/4
  • Cons
    • Softer wide open f/1.8 and still soft at f/2.2
    • Prime lens, no zoom range
    • Flares significantly

Recommendations: I would still consider the 28mm as a cheaper sufficient wide angle lens. I have countlessly shot 3 photo panoramas on the 28mm to create a higher resolution wide image and have been happy with the results. With this method you also reduce distortion on the edges. The 16-35mm f/4 may be sharper however I foresee difficulty creating any panormas if needed due to distortion on the edges. Also depending on the photography you are doing, I do not see significant differences between the two lenses even with the 28mm f/1.8 wide open at a web/online resolution. The artifacts and soft corners are only noticeable at full scale and only until about 10% from the margins. The centers remain sufficiently sharp in comparison to the 16-35mm f/4.

I did not purchase the 16-35 f/2.8 II due to the sharpness issues that have been well documented online and did not purchase the f/2.8 III for cost. As an occasional portrait and predominantely landscape photographer I did not feel a wide f/2.8 lens would be used as much to make it worth purchasing (will rent if needed only).

Addendum: This lens is perfectly capable in low light. The IS compensates sufficiently and allows for sharp photos without pushing the ISO to compensate for faster shutter speeds. You lose quite a bit of bokeh at f/4 but in my experience this is more noticeable because of the wider focal length, not so much the aperture limitation.

Photo by: Kevin Ly www.facebook.com/kevinlyphotography

Canon 6D 16mm, ISO 1600, f/4, 1/15sec

Purchase links for lenses discussed. Disable adblocker if they don’t appear.
   

Canon 28mm: http://amzn.to/2gSKCG0

Canon 16-35 f/4 L IS: http://amzn.to/2gN7xzW

Mo Photo


*disable adblock if links do not appear

DJI Mavic (Hands On): Jon Olsson + DigitalRev

About Me

I’m a full time medical student but in the rare moments I actually have time for myself I like to shoot anything and everything I can. I have always had a camera in my hand for as long as I can remember as the unofficial official family videographer. I started photography as a full time hobby sometime in 2012 due to my passion for extreme weather but quickly realized found myself in the event photography space as a college student with a camera and the know how of how to actually use one. I experimented with lenses, flashes, mostly all manual lenses because those were cheaper but I noticed I learned things a lot faster having to change things myself rather than if I could leave things on auto. My event photography continued into my medical school career in Grenada and had a few opportunities to experiment with portraits and group photography which aren’t that much different than events other than the fact that there are outfits, hair and formal posing. Living in Grenada also made it hard to say no to landscape and astrophotography. Living in NJ next to NYC for most of my life, astrophotography was never written in the stars for me (no pun intended, just kidding pun intended) but I had read a lot about it and knew what I needed to make it happen. Most of what I learned is from a lot of reading and preplanning and very little time experimenting because I found I’ve gotten to the point that I understand how things work in theory and can visualize results before doing them. My advice to those that always ask me to teach them how to use a camera: start in manual, learn how each setting works with the other to create the final image. Isolate each setting and change it to see how they all work individually before you try putting it all together.

Here are a few other sites relating to me:

Kevin Ly   |   My Medical School Blog   |    My Resume

FAQs

What do I shoot?

I try to learn how to shoot a bit of everything. I am happy with my proficiency in astrophotography, landscape, and event photography. I am expanding my knowledge in portrait, headshot and studio photography where posing and direction of the subject is more important.

Where do I shoot?

I try to do a lot of natural light but off camera flashes are difficult to master and I love the challenge and some of my more popular images do in fact use flash.

What do I shoot with?

I have a fairly extensive list of my gear but my favorite combination is a Canon 6D with the 70-200 f/4 L. I would like to upgrade to an f/2.8 at some point but for what I do currently, the current model I have now is sufficient. My second favorite combination recently has been the 60D with the 150-600mm f/5-6.3. The lens on a crop sensor body gives you enormous reach I have not even thought of what I could do with a teleconverter on it and why I would even need it at this point.

Gear

Who doesn’t like talking about gear?! Most beginners are and most professionals just don’t care anymore as long as it gets the job done. I’m still in the middle and I get a lot of questions so here’s a list of what I use and a few notes on how I use it and what I like/don’t like.

Full updated list: http://amzn.to/2h2nwtl


Body
 

  • Canon 6D mark I : Full Frame
    • This is my main camera. It has great low light / high ISO performance and great image quality. It’s the cheapest FF body that Canon offers and even after the 6D mark II release in 2017, I do not intend on upgrading to the II due to limitations in dynamic range of the newer sensor.
  • Canon 7D mark II: Crop
    • I use this primarily only with my Sigma 150-600. The crop body functions as a 1.6x teleconverter without decreasing image quality from a traditional teleconverter and is superior to cropping a full frame image from my 6D in post. I chose this over other crop body options for the 10 FPS burst which is magical in the world of wildlife photography.
  • Canon 60D : Crop
    • This is now more of a B camera / secondary camera which I use for timelapse photography. I do not use this regularly. The limitations in megapixels and poor high ISO performance makes this less valuable as a photography camera but I can still get decent 4K timelapses from setting up an intervalometer on this camera.

Lenses


Here’s how I use each of these lenses:

  • Sigma 150-600 f/5-6.3: Wildlife, Moon, Sports (in good lighting) w/ 7DmII
  • Tamron 70-200 f/2.8 IS G2: Portraits, Wildlife, Wedding/Events
  • Canon 24-70 f/2.8 L II: Primary lens for 6D. Wedding/Events
  • Tamron 35 f/1.8: “50mm” w/ 7DmII. Wide fast prime w/ 6D.
  • Canon 16-35 f/4 L IS: Landscapes – w/ 6D
  • Rokinon 24 f/1.4: Astrophotography – w/ 6D


  • Backup / Retiring : Canon 70-200 f/4: Portraits, Wildlife. Primary lens w/ 60D for long distance timelapse
  • Backup / Retiring: Canon 50 f/1.8: Paired with extension tubes for a decent low budget macro lens
  • Tokina 11-16 f/2.8: Useful as a wide on crop sensor cameras – 60D. Could be used on a full frame as a fish eye at 11 and wide at 16 but very soft in the corners at 11. All my wide options are now shot on the Canon 6D with the 16-35 f/4

Secondary B Cameras

  • Canon G16: The G16 is my go to travel camera. It’s light, portable, shoots RAW with decent image quality for the sensor size and the image stabilization can offer decent video recording. It’s semi-pocketable depending on how comfortable you want to be.
  • GoPro 4 Silver: …because why not really… I’ve used it as a travel camera for beach days, mounted it as a POV camera on my 6D during shoots for unique BTS photos and used it for a few underwater photos. Shooting in ProRes is nothing compared to RAW but it’s definitely good enough for sharing online and friends and family.

Flash


Accessories


Paired the gorilla pod with a ballhead and quick release


  • Extension tubes paired with a 50mm f/1.8 make a very cheap super macro alternative
  • ND 1000 filter for long exposures during mid day

Studio Gear


Video

Paired together for easier quick release setup


Audio


Retired Gear


  • I had to retire my Canon t3i due to water damage but it was definitely a good camera. I loved the crop mode in video and it was probably the best value camera. Most of the Rebel lineup have always been very good beginner first DSLR cameras.
  • The 70-300 was my favorite lens until I upgraded to the 70-200 f/4 L. The L glass at 200 was sharper than 300 on this one so there was no reason to hold on to it. As my first telephoto lens though I had no problems and the Nikon equivalent is 55-250 which covers the middle range better but shorter on the longer end.
  • My favorite lens at the time had to be the 8mm fisheye. The adapter I had earlier was just too soft and the threads on the t3i are plastic so I was worried about stripping out the filter threads. The 8mm fisheye was fully manual but because it was fisheye, I set it to infinity and was usually tack sharp stopped down to f/4.
  • I replaced the Canon 28 f/1.8 which was my go to wide AF lens for the 16-35 f/4. I replaced it due to the flaring and soft edges/corners even though I end up losing close to 2 stops of light in the process. The IS o f the f/4 has made it an acceptable replacement option for my use. See my comparison between the 28 f/1.8 and 16-35 f/4

Updated Amazon Camera Gear List: http://amzn.to/2h2nwtl

Events

My full event work usually goes on my Facebook due to costs of hosting entire albums indefinitely online.

All high res photos of events are still available offline, contact me for details.

See the rest of my portfolio by section in the menu.

Contents

Hi everyone!

So some of you may have already guessed or already know, but I’ve been getting into photography and have been building up some experience with cameras over the last few years. I’ve shot on phones, point and shoots and DSLRs and have found ways to get the best of what I was using. Hopefully the articles I generate here can give you some insight on how to apply what I’ve learned to your own photography. I’m no professional so I’m willing to learn from you as well. I believe it’s all about making the best of what you have and getting as close to the professional look with what you have and enjoying it in the process.

My thought and intent is to create an e-book or online course for intermediate to advanced photography, however in the meantime, I’d like to just share what I’ve been working on. The project is currently named Photography for EVERYONE, not a dummies manual for beginners and if you follow along, you can see the progression of difficulty and improve at your own pace in the areas you are interested in.

If the following are not linked or starred*, that means it is still being written. I have targeted a lot of my writing towards DSLRs because that seems to be the “trend” in what people are buying and what people are not knowing how to use. Some techniques are applicable to point and shoots and non-interchangeable lens cameras though.

Preface – Intro to Photography

Ch 1 – Nature / Landscape photography Intro

Clear Waters – (ocean/beach)

Running Water – (rivers/streams/long exposure)

Sunsets

Solar Eclipse

Ch 2 – Night photography – Intro

Some scenarios

Capturing the Moon

Seeing into the Milky Way

*Nightscapes

Fireworks

*Ch 3 – Flash / Strobe techniques

*Ch 4 – iPhoneography


Suggestions are welcome. This is a very dynamic list. It will probably change every time I work on this as I come up with more ideas for more content. Leave a comment below or send me an email to kevinly@me.com if you have requests for topics. Guest writers are also welcome if you are familiar with a certain topic.

If you feel this page is worth something to you and feel like contributing/donating, send me an email: kevinly@me.com. This is certainly not why I’m doing this but if I do generate anything monetary out of this, it will likely go to a local charity. It’s just that future doctor mentality of giving back and helping others. 

Weather

Cityscapes