


Daytime long exposure photography is much rarer and seemingly more difficult than long exposures at night. At night, more often than not, long exposure is necessary to get a proper exposure. During the day, shutter speeds can be anywhere between 1/100 to 1/8000 and still retain a proper exposure. There are some times during the day however when we would intentionally want a long exposure, such as running water, streams, waterfalls, capturing motion. In some cases, panning at 1/50sec is enough in fast moving cars or bikes. With landscapes however, we usually need 30seconds-1minute to achieve a silky blurred effect on the water. As most people find out very quickly, that is very hard to achieve even with a regular ND filter or polarizer in direct sunlight. The expensive and proper approach is to get a 10 stop ND filter, end of story, but what if I told you there’s an easier way to get 98% of the same effect without an ND filter at all.
In this method, I will be using a Canon G16 point and shoot, Lightroom and Photoshop to composite the final image.
Setting up the shot: Use settings that will minimize light to the sensor in order to maximize shutter speeds. Settings on my camera were: ISO 80, f/8.0 on Aperture priority creating a final single shot shutter speed of .8 seconds. I kept my focal length/zoom as wide as possible in order to crop/straighten as necessary as I didn’t have a tripod either. I used a flat rock. Knowing before hand I wanted about a 15 second exposure I held down my shutter in order to shoot about 20 shots to total close to 15 seconds at .8 each. It is important to keep your composition the same through this series.
Import into Lightroom and process as necessary before proceeding. 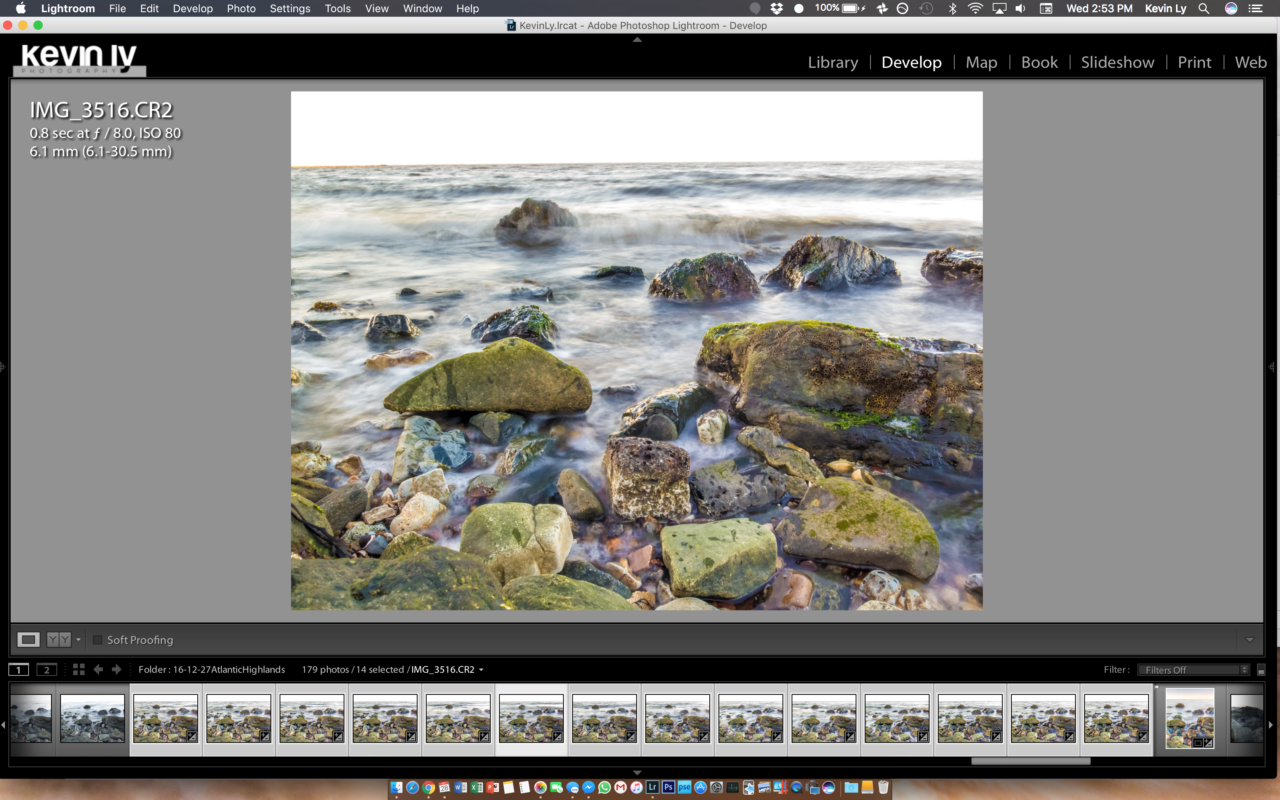
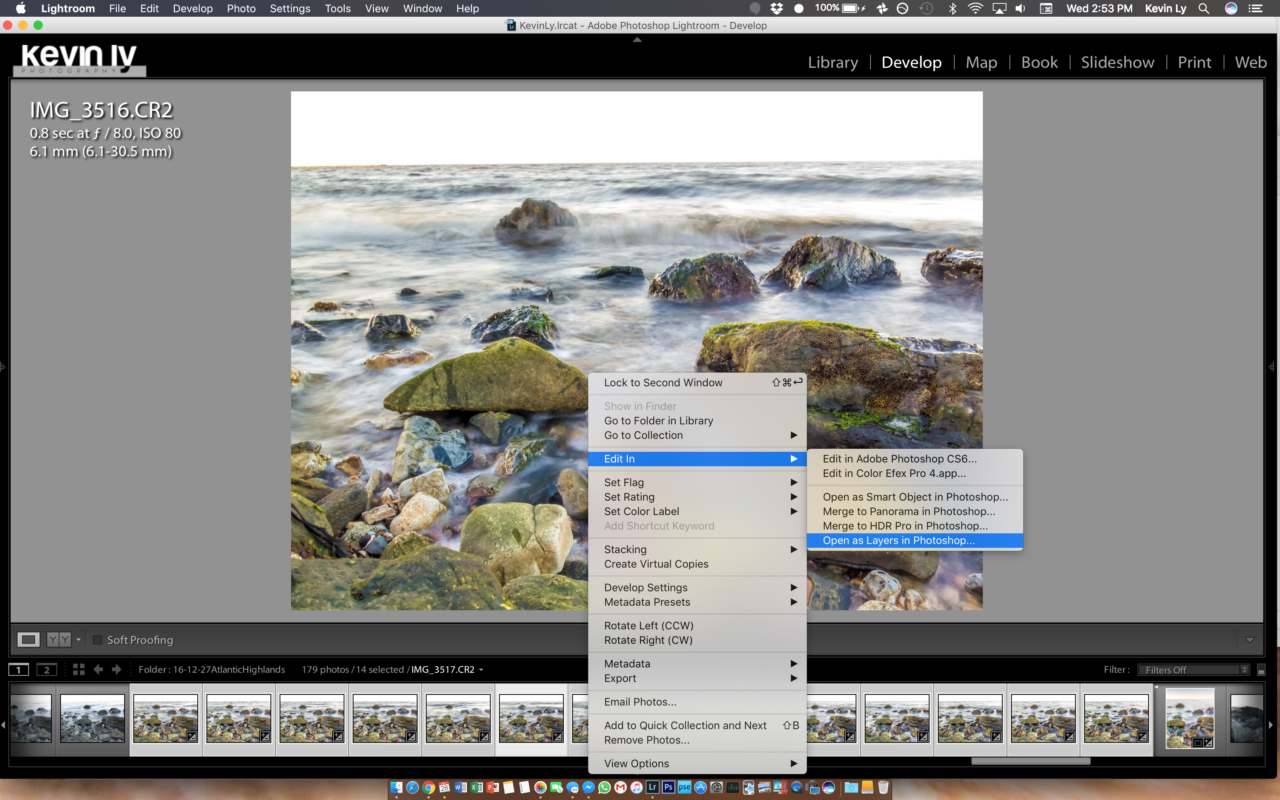
Most of the fancy magic happens in PS so I selected my entire set and selected the Edit in PS as layers option. This will automatically open the series as individual layers in the same PSD file.
Once you have them all loaded, you want to align the shot in case there was slight movement, especially since I didn’t use a tripod I wanted to make sure everything was aligned however in every case, I recommend aligning the shots again just to make sure.
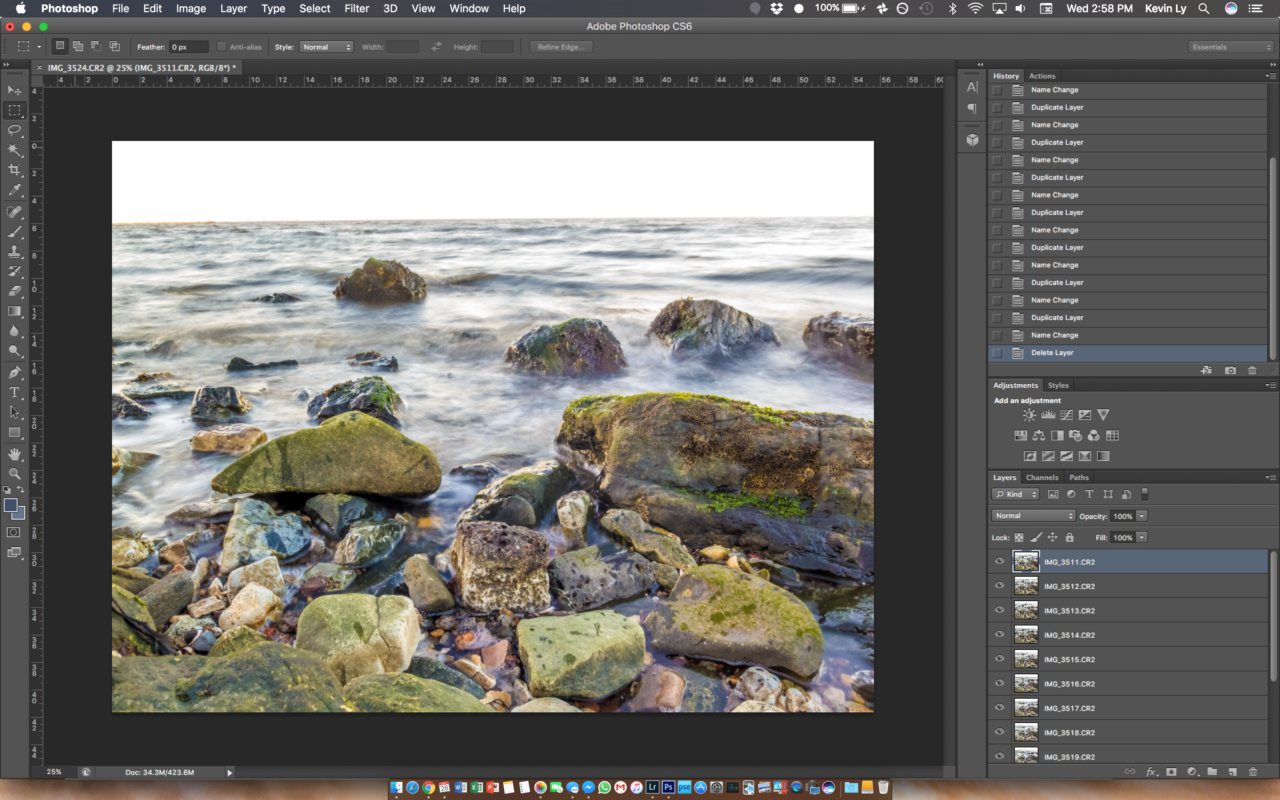
To do this, make sure you highlight all your layers.
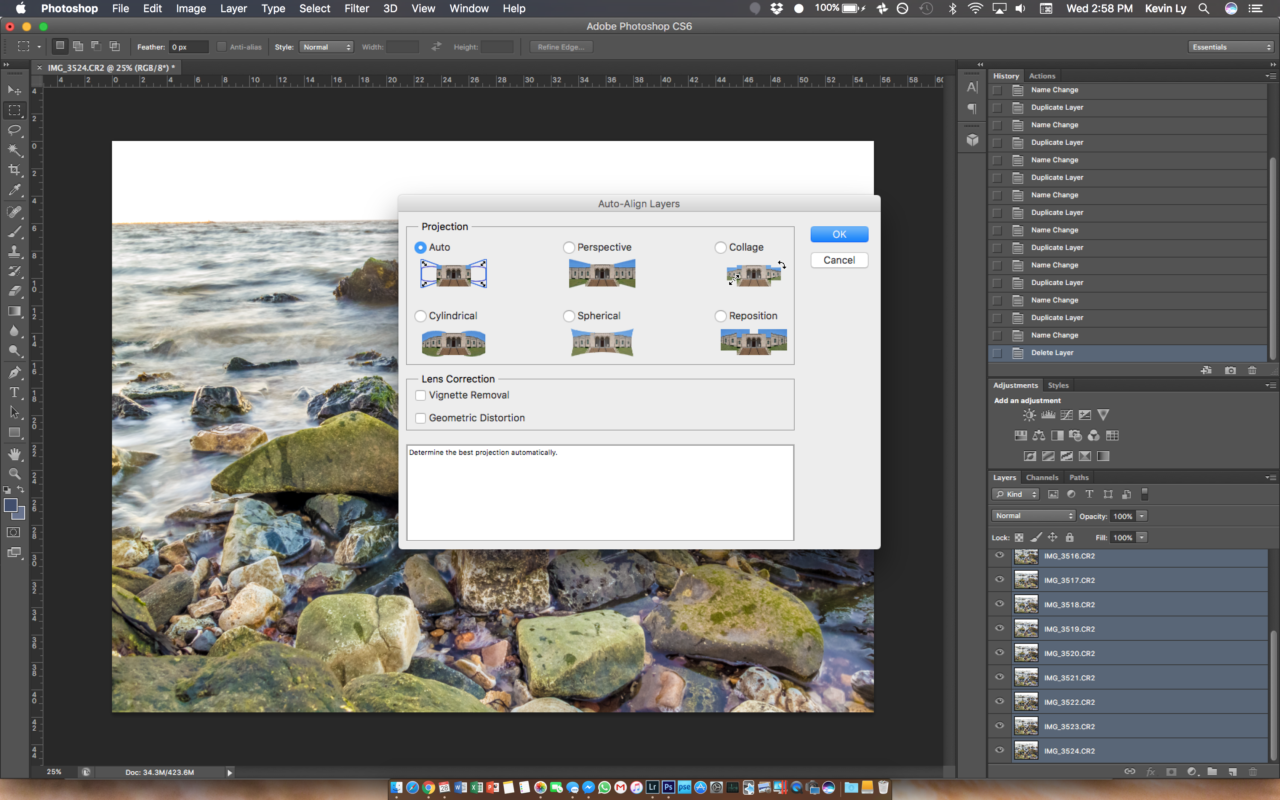
I chose the auto align option since I didn’t expect much movement between my shots and PS can do a decent job guessing in this scenario.
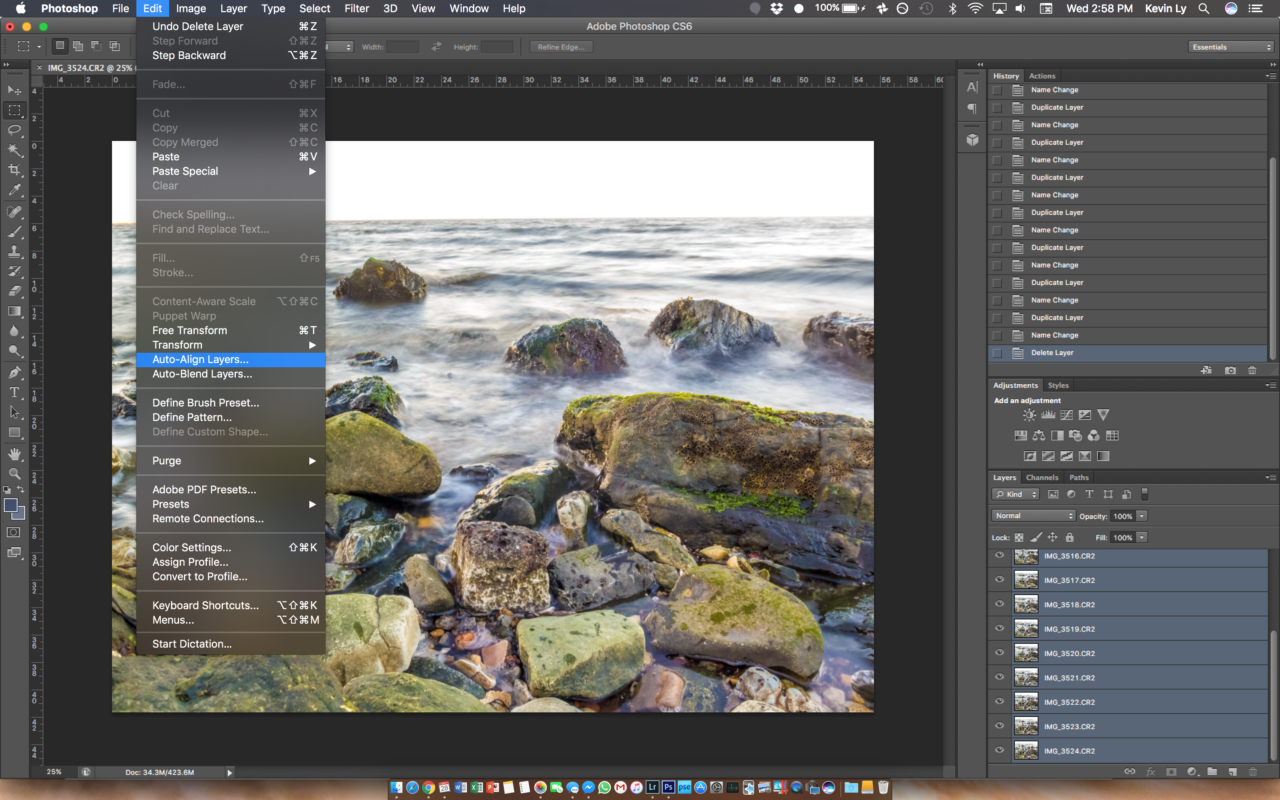
For fixed shots / semi fixed where you intentionally don’t move as much as possible like how we set up this shot, the Auto option is usually enough.
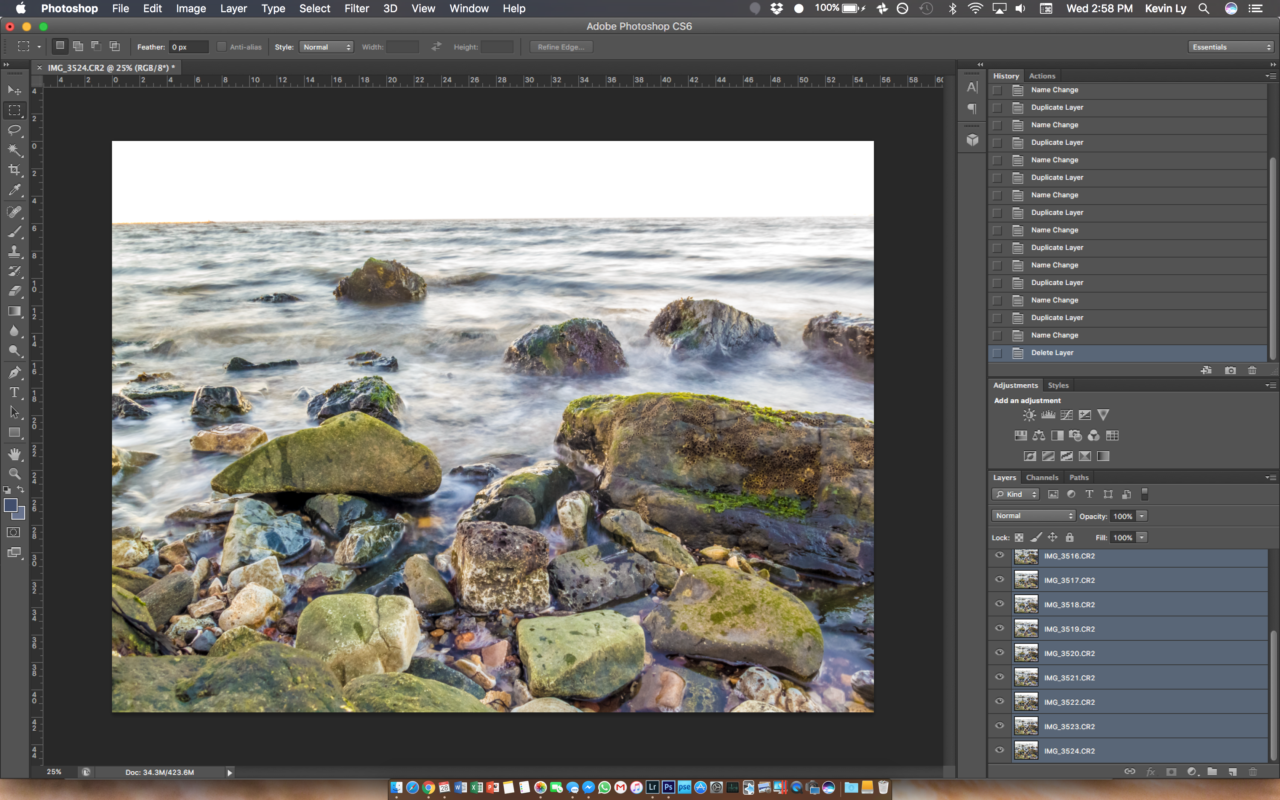
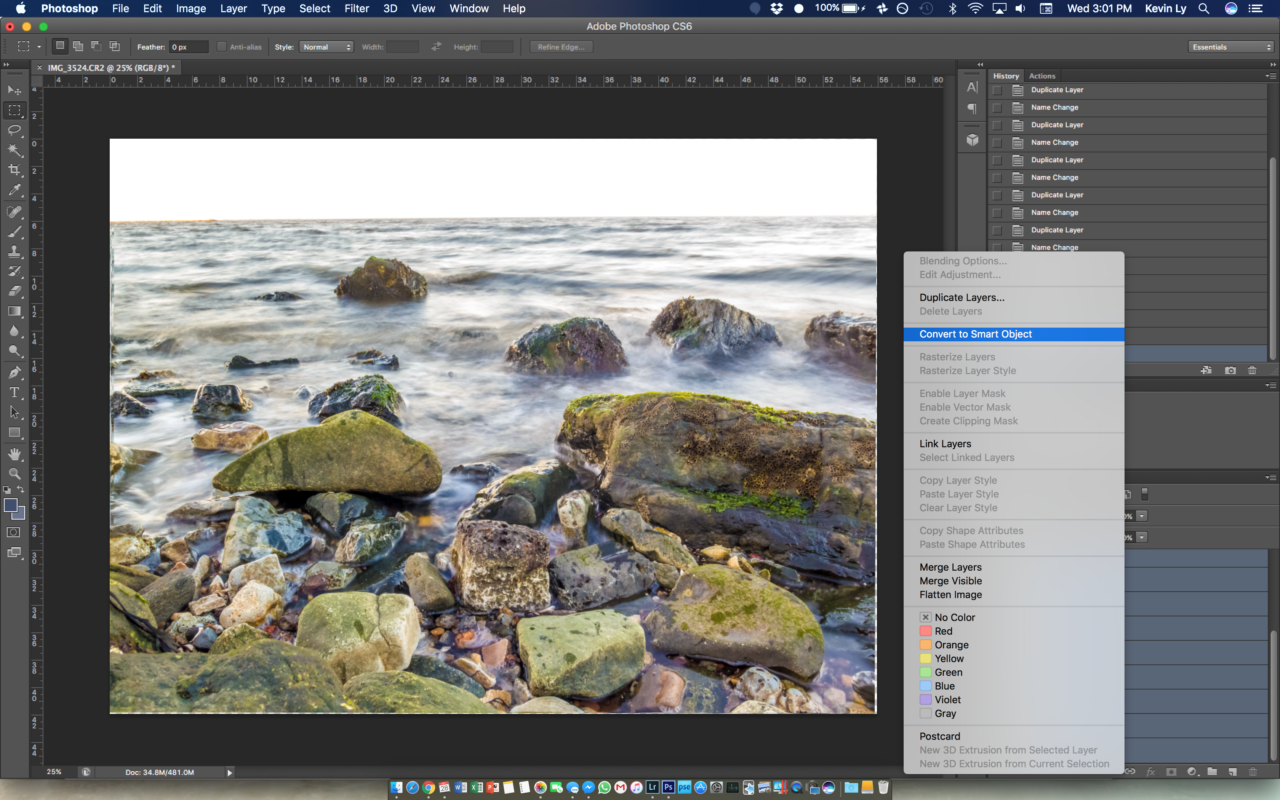
Once your images are aligned, select all your layers again and choose Convert to Smart Object
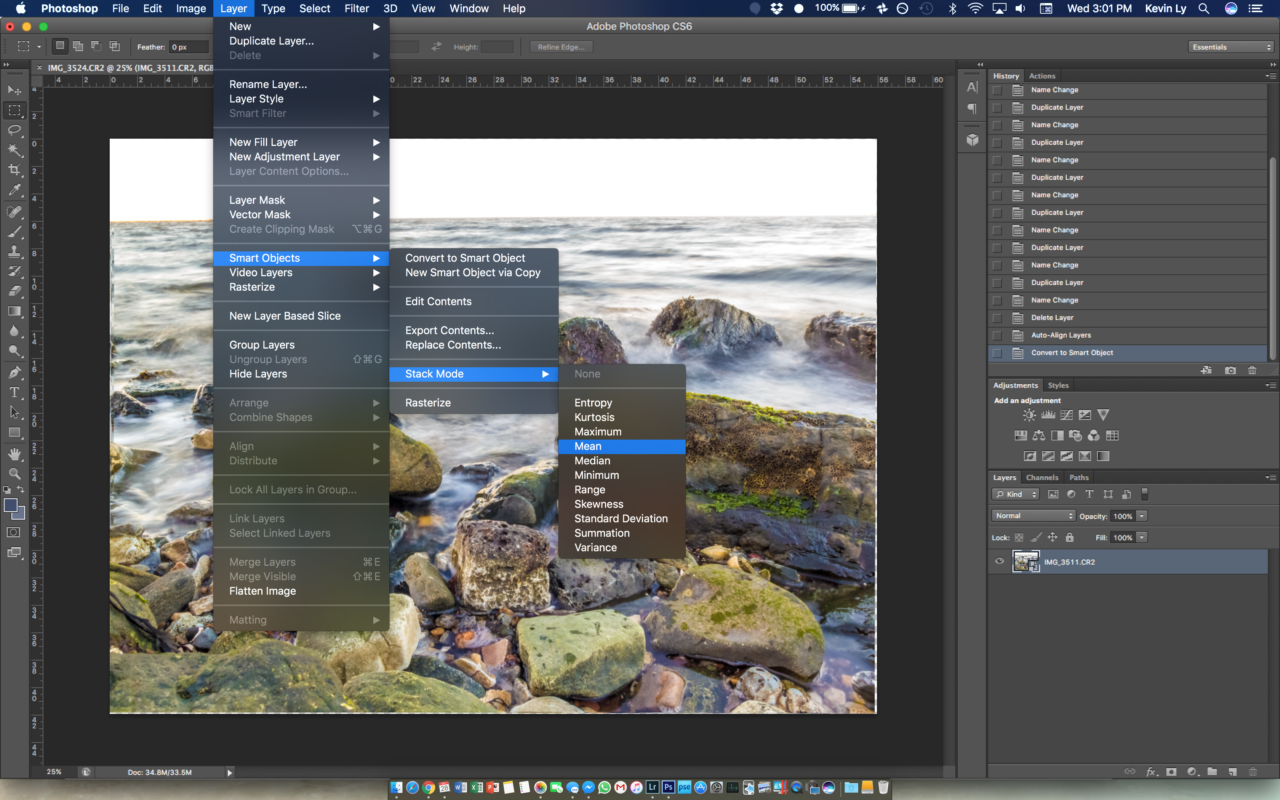
Once your images are converted to the smart object we want to change the stack mode of this smart object to Mean. Mean as we learned in math is the average so PS will average out every pixel at a given spot to the average value across every layer. This results in the average across the total exposure time of shutter speed x #frames which simulates a long exposure of about 15 seconds. If every frame is about a second and we have 15 frames, adding all those frames together and dividing by 15 will be very similar to if you had a single exposure at 15 seconds.
The final result is seen here.

This technique can be applied to almost every short shutter speed scenario requiring long exposure times. Simply calculate the total frames needed in order to simulate your total exposure.
If this post/tutorial helped, let me know in the comments and let me know if you’d like to see more or if there are any requests for different techniques.
